Installing, Activating and Updating the Software
If you are using ElNotes on an ElBraille device, it will come preinstalled on your system. If however you purchased the software separately, you will need to install it on your PC.
A notes database file will be created on first run. It will be located in My Documents\ElNotes folder and will be called elnotes.eldb.
Then, if you purchased ElNotes separately, you will be prompted to activate the software. In order to activate ElNotes, you need to have Internet access. For software activation please enter the serial number and activation key you received on purchase, and then click Activate.
If you purchased a personal license, this will be indicated in the main app window title and in the About ElNotes window. If you use the software on an ElBraille device, it will come with an unrestricted license.
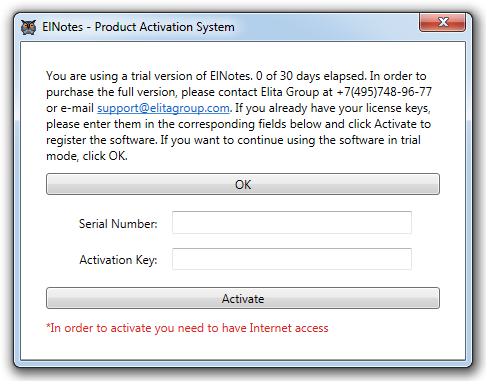
You can also postpone the activation and use a 30-day evaluation period to try the application and decide whether you like to purchase it.
In order to temporarily use the application without activation, click OK in the Activation System window.
You can return to this window and activate the product at any time. To do this, go to the Help menu and select About. In the window containing information about the version number and evaluation days remaining, click Activate.
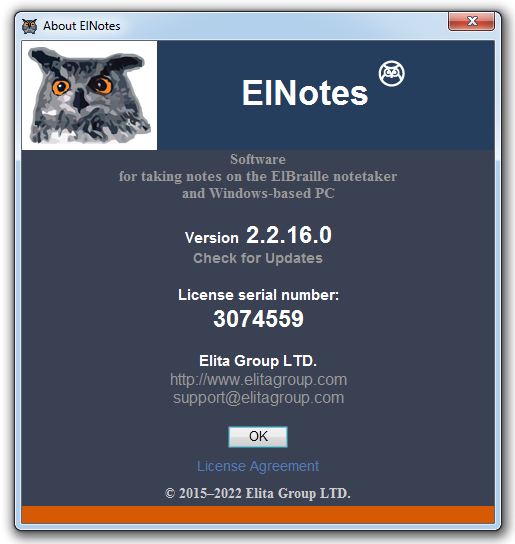
This window also allows you to check if there are software updates. To do this, click the Check for Updates link. If a new version exists, you’ll see the Software Update dialog. If however you are using the latest version, a No ElNotes Update message will be displayed.
Note: If the Automatically Check for Updates option is checked, ElNotes will check for updates automatically every time it is launched.
ElNotes Interface
Let’s look at the main ElNotes window.
The application window consists of three regions: categories list, notes list and note view.

Note: If the notes database is not found on software launch, the Storage Options window will be opened. There you can indicate the location for an existing notes database.
Note: When working on the ElBraille, you can start ElNotes by pressing E4. To launch the app on your PC, press Ctrl+Alt+E.
Categories List
Just after software installation the categories list contains two items: Uncategorized and All Categories. These categories cannot be removed. The number of the notes in a given category is shown just after the name of that category in parentheses.
Note: You can turn off displaying of the All Categories item in ElNotes options. For more information please refer to the ElNotes Options section.
You can create as many categories as you want and give them any names.
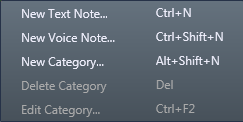
To create a new category, navigate to the File menu and select New Category.
A window will be opened where you can indicate a name for the new category. The name cannot be longer than 100 characters.
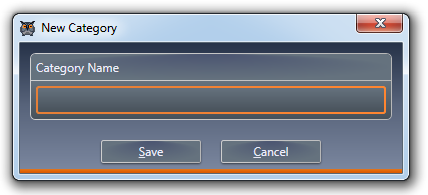
You can also invoke this window by pressing Alt+Shift+N or Ctrl+Alt+N (if you work on ElBraille, press Dots 6+7+8 chord or Dots 3+6+8 chord, then n) or use the context menu of the categories list. To open the context menu, use the Applications key (right Shift+Dot 2 chord).
In order to use the context menu of the categories list, you need to be located in this list. The commands related to editing and deleting a category will be available or unavailable depending on what category is selected at the moment — the one created by you or a preinstalled one.
Note: If you have NVDA Screen Reader installed, the keyboard shortcut Ctrl+Alt+N, by default, will initiate the launch or restart of this program.
You can also use keystrokes to edit or delete your categories.
To rename the selected category, press Ctrl+F2 (Dots 1+3+8 chord, then b).
To remove the selected category, press Delete (Left Shift+d).
Notes List
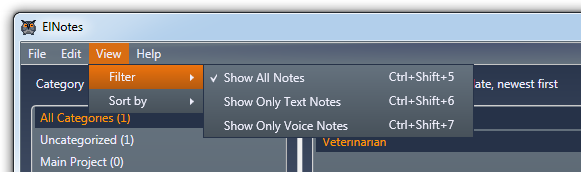
To go to the notes list, press Tab (Dots 4+5 Chord) or Enter (Dot 8) when in the categories list. The notes list contains all of your notes grouped by category. To see all of your notes in one list, please choose the All Categories item. You can use filters to see only text notes or only voice notes.
To filter your notes, select the Filter item in the View menu.
You can also sort your notes by name or by last modified date.
To announce filter and sorting information, press Insert+End (Left Rocker bar up+Right Rocker Bar up).
To announce the category of the given note when in the list with notes of all categories, press Insert+PageDown (Left Rocker Bar down+Right Rocker Bar down).
You can remove a note by selecting Delete Note from the Edit menu. Alternatively, you can select the note you want to remove and press Delete (Left Shift+d) or use the context menu.
There is also a Copy Note item both in the Edit menu and in the Context menu of the note. If you select this item, the note name and text will be copied to the clipboard. You can use this feature to create a similar note or to use the note text in another application.
If you apply this command to a voice note, only the name will be copied.
If you selected several notes before clicking this item, only the first note text will be copied.
You can select several notes in the list as usual, either by holding Shift and selecting consecutive notes or by holding Ctrl and selecting the needed notes with Spacebar. You can then remove all of the selected notes either by pressing Delete or by selecting the corresponding item in the application menu or in the Context menu.
A confirmation window will appear. This is handy because you won’t delete your notes by accident.
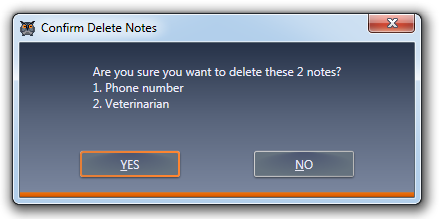
Select Yes if you want to delete the selected notes; select No if at least one note is selected in error.
To rename the selected note, press F2 (Dots 1+8 Chord, then the letter b). You will land in the note title edit field. Modify the note title as you want and press Enter (Dot 8). If you changed your mind and do not want to rename the note, press Escape (z Chord). You can also rename the note by selecting Rename in its context menu.
To quickly change the category of the selected notes, press Ctrl+M (Dots 3+8 Chord, then m). Pick the category you want and press Enter (Dot 8). You can also change the category from the context menu of the note by selecting Change Category. In the submenu that appears select one of twelve last categories and press Enter (Dot 8).
You can also search for a note. To do this, press Ctrl+F (Dots 3+8 Chord, then f). Alternatively, you can tab through the window until you get to the search field. Type in the text you are searching for and press Enter (Dot 8).
Both note names and texts are searched. If something is found, you’ll be brought to the first note in the list where your search string occurs. In this case only the notes containing your search string will be displayed in the list. The number of results found as well as the whole number of notes searched is displayed.
To clear the search field and thus reset the notes filter, press Escape (z Chord) or click Clear Search String.
Note View
To go to the note view, locate the note you want to read in the notes list and press Enter (Dot 8). The Note view allows you to view the contents of the note.
If a text note is selected in the Notes list, the Note view will contain the name of the note, the category it belongs to, and its text.
To return to the notes list, press Escape (z Chord). Alternatively, to cycle between the notes list and the note view, you can press Ctrl+Enter (Dots 3+8 chord, then Dot 8).
In the Note view you can change note name, category and text. Your changes are saved automatically.
If a text note is selected in the notes list, you can search for a word or phrase in the note text. To do that, press Ctrl+F (Dots 3+8 Chord, then f). A search dialog will open.
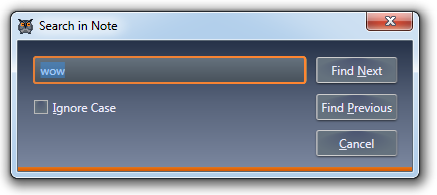
If something is found, you’ll be taken to that place in the note. To continue searching, press F3 (Dots 1+8 Chord, then c).
When ElNotes finishes searching through the note, you will be asked whether the search should be performed from the beginning of the note.
If nothing is found, you’ll be presented with a corresponding window.
If a voice note is selected in the Notes list, the Note view contains an audio player to listen to the note.
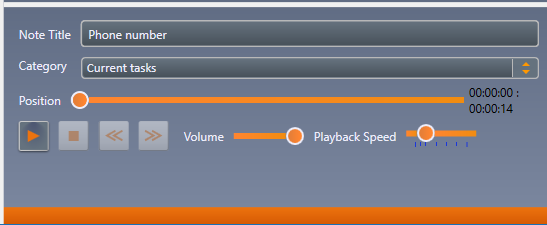
Here you can find usual playback controls, and also the sliders that adjust volume and playback speed.
Creating Notes
In ElNotes you can create a text or voice note in one of the following ways:
- If working on an ElBraille, to create a text note, press E4 briefly; to create a voice note, press and hold the E4 key until you hear a clicking noise. Release the key just after the click.
- Navigate to the File menu and select New Text Note or New Voice Note, respectively.
- To create a text note, press Ctrl+N (Dots 3+8 chord, then n). To create a voice note, press Ctrl+Shift+N (Dots 3+7+8 chord, then n).
- Select the desired item in the context menu of the Categories list.
After one of these actions a New Note window will open.
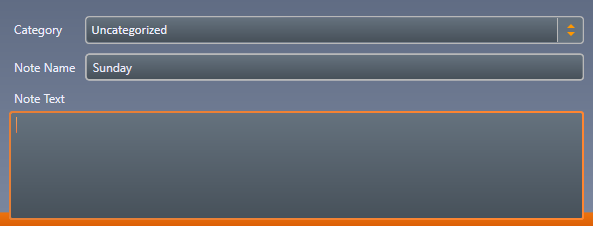
If you are creating a text note, it contains the following items:
- Note Name — enter here the name of your note.
- Note Text — input the text of your note here.
- Category list — you can select any of the presented categories. The category that was active before you invoked the New Note window is selected by default.
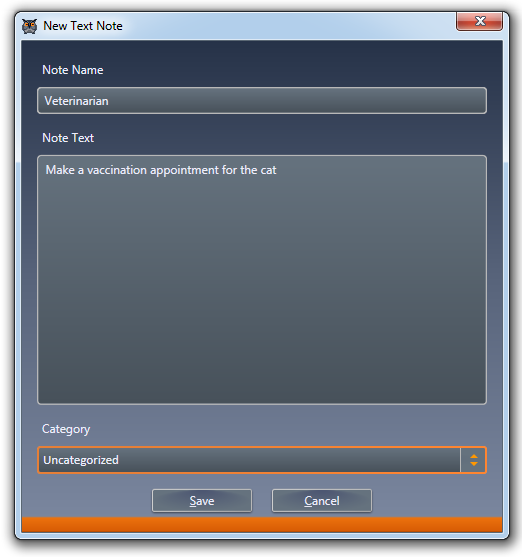
Fill in all the fields in this window and click Save. If you changed your mind and don’t want to create this note, click Cancel.
Note: If you need to add a tab character when writing the text of your note (for example, to divide the text into two columns), use Ctrl+Tab (Dots 5+6 Chord).
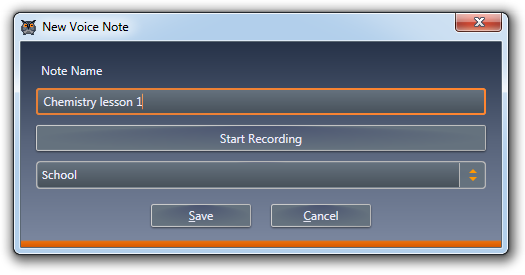
If you are creating a voice note, the window contains the note name, the Start Recording button, and the categories list.
Note: If no microphone is attached to your PC, you’ll get an error message when trying to create a voice note.
To record your voice note, navigate to the Start Recording button and then press Space bar or press and hold the E4 key, if working on an ElBraille. The note is being recorded using a built-in or external microphone. The text on the button is changed to Recording… while the recording is in progress.
To pause the recording, press Space bar again or release E4. The text on the button will return back to Start Recording. To continue recording, press Space bar or press and hold E4 again.
Tip: We suggest to turn off tutor messages in JAWS for better recording experience. If these messages are turned on, you may hear JAWS speaking at the beginning of your voice note recording.
To save the voice note, click Save. If you changed your mind and don’t want to create this note, click Cancel or press Escape (z Chord). You will be asked whether you want to save the note or not.
You can listen to the saved voice note in the Note view area.
Note: If you work on an ElBraille device, you can quickly create a voice note by pressing and holding the E4 key when in the ElNotes main window. Voice note recording starts in one second after the clicking sound, and it is being continued until you release the key. When you release E4, the newly created note is saved under the "Untitled Voice Note" name.
Exporting and Importing Notes
You can export your notes to TXT or MP3 files in order to be able to access them from other applications or on other devices. Each note will be exported as a separate numbered file into the folder you choose.
You can either export all notes at once or store only the notes of a chosen category or just individually selected notes.
To export all the notes at once, please do the following:
- Select Export all Notes to a Folder from the File menu or press Ctrl+Shift+S (Dots 3+7+8 chord, then s).
- In the window that appears select the folder to export the notes and then click OK.
- In the indicated folder some files will appear. They will be called 1.txt, 2.txt, 3.mp3 and so on.
In order to export selected notes, select the desired notes first. You can do this in the Notes list. You can select notes one by one or use the Select all Notes in Category command from the Edit menu. Use this feature if you need to select all the notes in some category.
Then select Export Selected Notes to a Folder from the File menu or press Ctrl+S (Dots 3+8 chord, then s). Choose a folder to export the notes to and click OK.
Warning! Choose a folder carefully because there will appear many files, and their number will match the number of notes you selected. For instance, we don’t recommend exporting notes to the Desktop since it would be uncomfortable to delete a large number of individual files from the Desktop.
You can also export notes to a database file for future use on another ElBraille or PC where ElNotes is installed. To do that, perform exactly the same actions that were described above, but this time select either Export all Notes to ELDB file or Export Selected Notes to ELDB file. In order to quickly make a full copy of the current database, select Save a Full Copy of the Current ElNotes Database File.
If you had exported your notes to a folder or to an ELDB file before and now you want to add those notes to your notes list, navigate to the File menu and select Import Notes from Folder or Import Notes from ELDB file, respectively. Note duplicates will not be imported.
You can also import arbitrary text files from any folder. To do this, also select Import Notes from Folder from the File menu. Each note imported from a text file will have the name of that particular file.
ElNotes Options
You can adjust ElNotes options to your liking by selecting Options from the File menu or by pressing Ctrl+Shift+O (Dots 3+7+8 chord, then o).
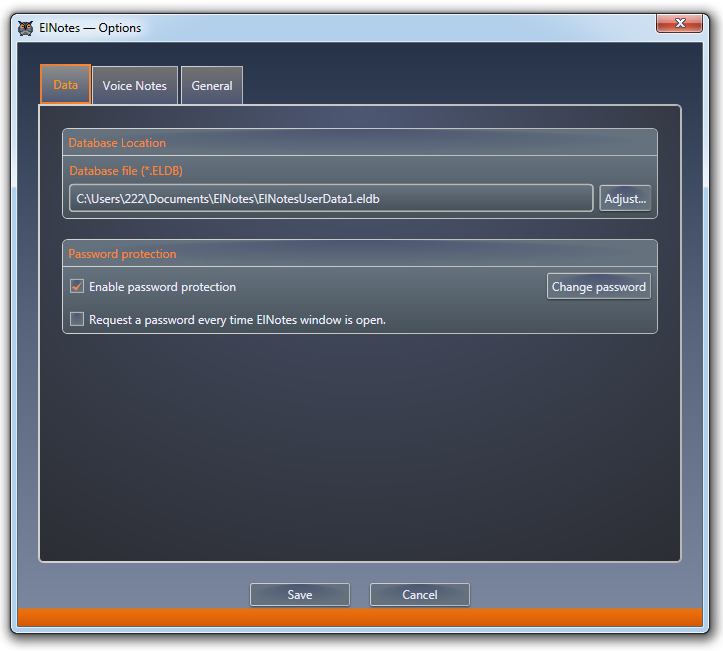
The «Options» window has the following three tabs «Data», «Voice Notes», «General»:
- Data tab. In this tab, you can select the type and location of notes storage, as well as enable password protection. The tab contains:
-
Group of elements «Database Location» — Here your notes database path is given. By default it is an ELDB file located in the ElNotes subfolder of your documents folder. If you want to change your database location, please click the Adjust button located nearby.
the Database Storage Options window will open.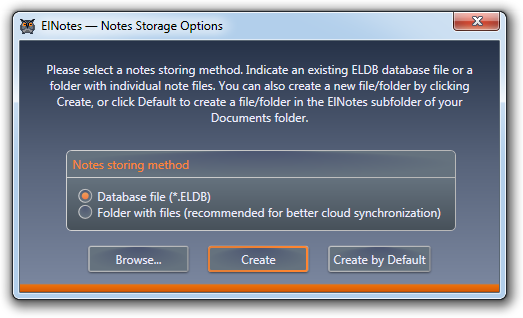
Select notes storage type and location. If you frequently need to bring your notes with you, for example, on a USB thumb drive, select ELDB file here. If you need to synchronize your notes in a cloud or perform other frequent actions with individual notes, select Folder with Files. If you select Folder with Files, each text note will be saved in a separate text file, and each voice note will be stored in two files: one text file for the note name and one MP3 file for the note itself. Please note that it is highly recommended not to modify this folder manually — if you need to add, edit, or delete notes, please use ElNotes interface.
Note: If you have connected your PC to Microsoft OneDrive cloud storage, Windows 10 synchronizes all the Documents folder by default. If that fits you, we recommend to store your notes in a folder with files, since otherwise each modification even of a single note will lead to re-synchronization of the whole ELDB file which will take some time as well as some additional Internet bandwidth.
There are three buttons in this window: Browse — helps you to select the path to an existing EDB file or folder with notes; Create — creates a new ELDB file or folder for storing notes; By Default — resets the path to default value and creates an ELDB file or a folder for notes storage in the ElNotes subfolder of your Documents folder.
-
Group of elements "Password Protection" - here you can enable or disable the protection of your notes from access by strangers using a password. This option is only available if the notes are stored in the ELDB database. This group of elements contains:
- «Enable Password Protection» checkbox
- «Change Password» button
- «Request a Password Every Time ElNotes Window is Open» checkbox
By default, «Enable Password Protection» checkbox is unchecked. Check this box if you want your notes to be password protected. After enabling, the window «ElNotes — Create a Password» will appear:
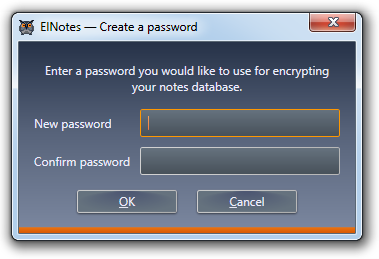
In the «ElNotes — Create a Password» dialog fill in the following fields:
- New Password — enter the desired password.
- Confirm Password — enter the desired password again.
To confirm and close the «ElNotes - Create a Password» dialog, click the OK button.
Note: Password must contain at least 3 characters.
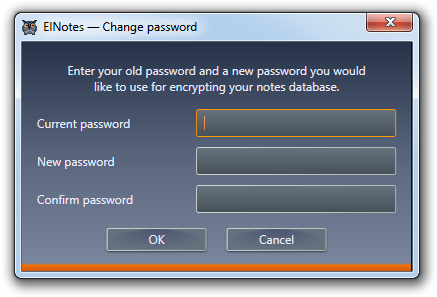
After you have set a password, next to the «Enable Password Protection» checkbox will appear the «Change Password» button. If you want to change your password, click the «Change Password» button and in the dialog that opens, fill in the following fields:
- Current Password — enter in this field the old password, the one that you decided to replace with a new one.
- New Password — enter the desired password.
- Confirm Password — enter the desired password again.
To confirm your choice and close the «ElNotes - Change Password» dialog, click the OK button.
After you have set a password, when you start the ElNotes application, a dialog will appear asking for a password:
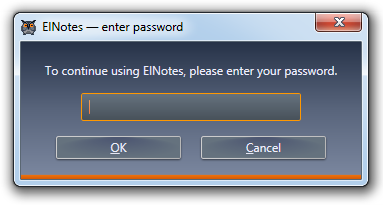
To enter the application, enter the password and click the OK button. By default, the entered password is valid within one work session. After restarting the program, the password will have to be entered again. It should be noted that when the checkbox is checked «Do Not Exit the Application on Window Close», the password is requested only the first time the application window is opened, and is not requested the next time. If you want the password request to occur every time the program starts and when the application window is maximized from memory, with the checkbox checked «Do Not Exit the Application on Window Close», check the box «Request a Password Every Time ElNotes Window is Open.»
ATTENTION: Be careful when choosing and entering a password and do not forget it. When setting a password, the database file is encrypted, and access to it without a password becomes absolutely impossible. Forgotten password cannot be restored or changed! If you forget your password, your data will be lost and ElNotes can only be started after deleting or moving the database file. In this case, the program will start and open the notes storage settings dialog.
-
-
«Voice Notes» tab:
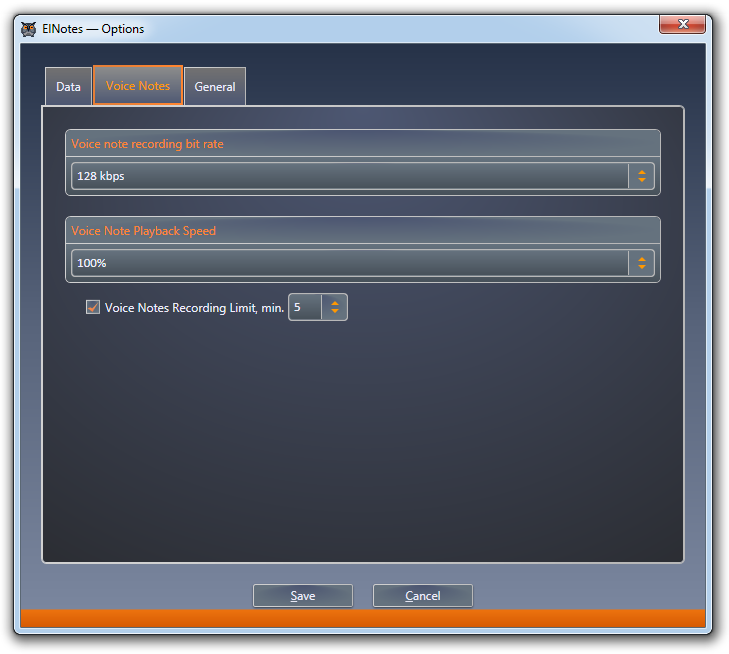
Here you can set the following options:
- Voice Notes Recording Bit Rate — select the bit rate for newly recorded voice notes. The higher is the bit rate, the better is the sound quality, but notes would take more space in the database; the lower is the bit rate, the worse is the sound quality, but notes will take less space in the database.
- Voice Notes Playback Speed — select the playback speed for voice notes by default. 100% corresponds to the normal speed.
- Limit Voice Note Recording Time — check this check box to restrict recording time by selected number of minutes. You can select a number from 1 to 20 in the adjacent combo box. The check box is checked by default, and a 5-minute limit is set.
-
General» tab:
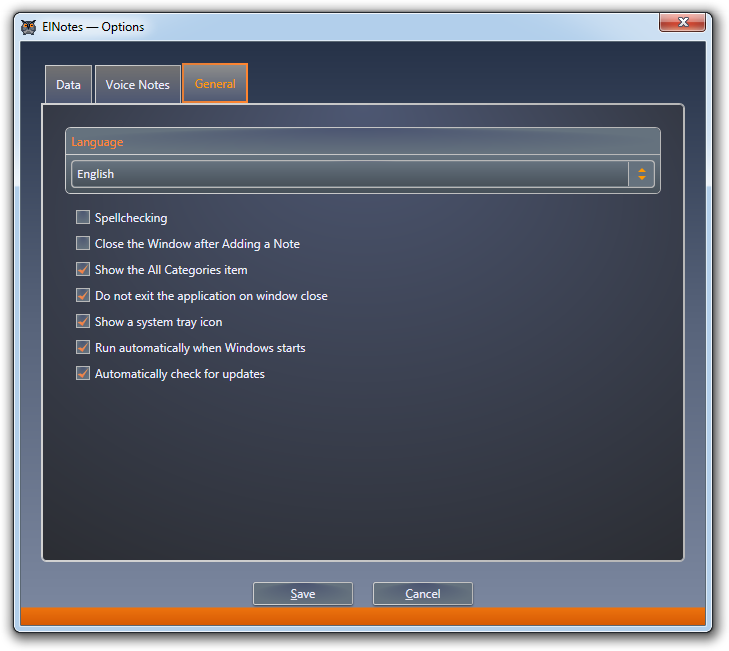
Here you can set the following options:
- Interface Language — allows you to select the language of ElNotes menus and dialogs. The language ElNotes was installed in is selected by default.
- Spellchecking - check this box if you want to perform automatic spell checking by means of the operating system. Available for Windows 10 and above.
- Close the Window after Adding a Note — check this check box if you want the window to be closed after adding a note. This check box is not checked by default.
- Show the All Categories Item — check this check box if you want to have the All Categories item displayed. This item will allow you to show all notes in one single list. Uncheck the box if you don’t need this feature. This check box is checked by default.
-
Do Not Exit the Application on Window Close — check this check box if you want the application to stay in memory when you close its window. This will allow you to open ElNotes or to create a new note much faster. the check box is checked by default.
- Show a System Tray Icon — if this box is checked, the ElNotes shortcut will be displayed on the system bar. This will allow you to open the application much faster, as well as create text and voice notes. The shortcut context menu contains the following items:
- Open ElNotes — opens «ElNotes».
- New Text Note — opens the «New Text Note» dialog.
- New Voice Note — opens the «New Voice Note» dialog.
- Exit — closes ElNotes and removes the shortcut from the system tray.
By default, «Show a System Tray Icon» checkbox is checked.
- Run Automatically when Windows Starts — if this check box is checked, ElNotes will automatically start whenever you turn on your device. The check box is not checked by default.
- Automatically Check for Updates — if this check box is checked, ElNotes will check for new versions each time the software is launched. If the check box is cleared, you can check for updates manually from the About window available from the Help menu. The check box is checked by default.